Add widgets to your templates so that your signers can fulfill their data and information during the signing process.
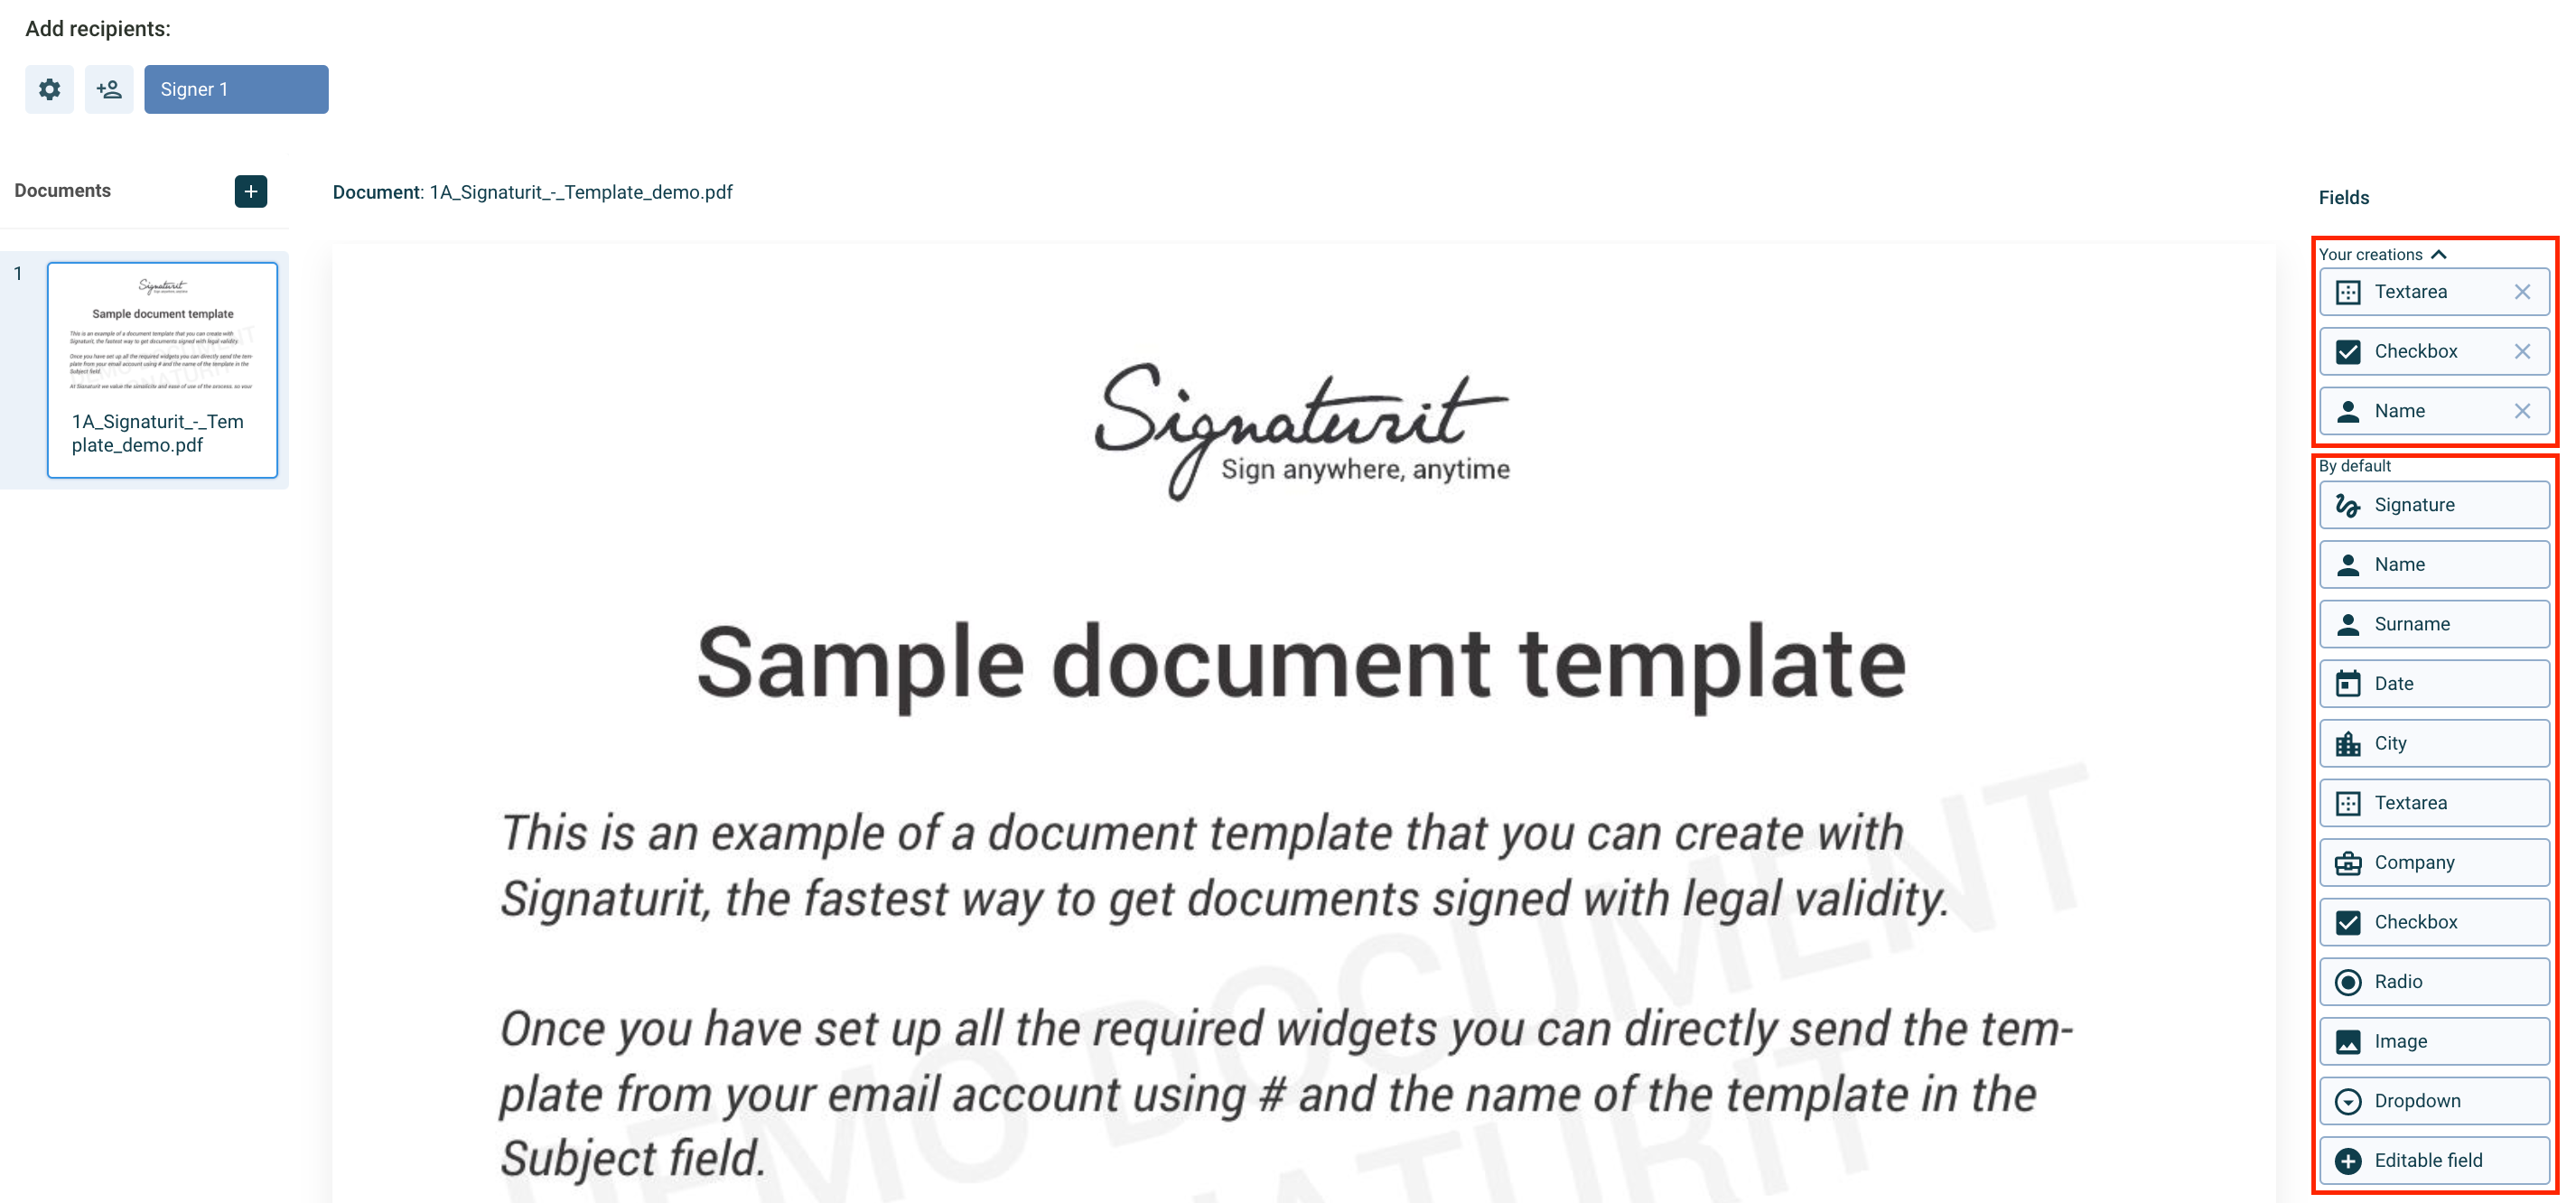
Signaturit offers you 9 widgets:
- Signature
- Editable field
- Textarea
- Date
- Checkbox
- Radio
- Image
- Dropdown
- Digital Certificate
This list is accessible to you from the right side of the screen. We'll show you how to use each one of these widgets:
To see the steps to duplicate widgets go to the following link: Duplicate widgets on multiple pages
Place a widget:
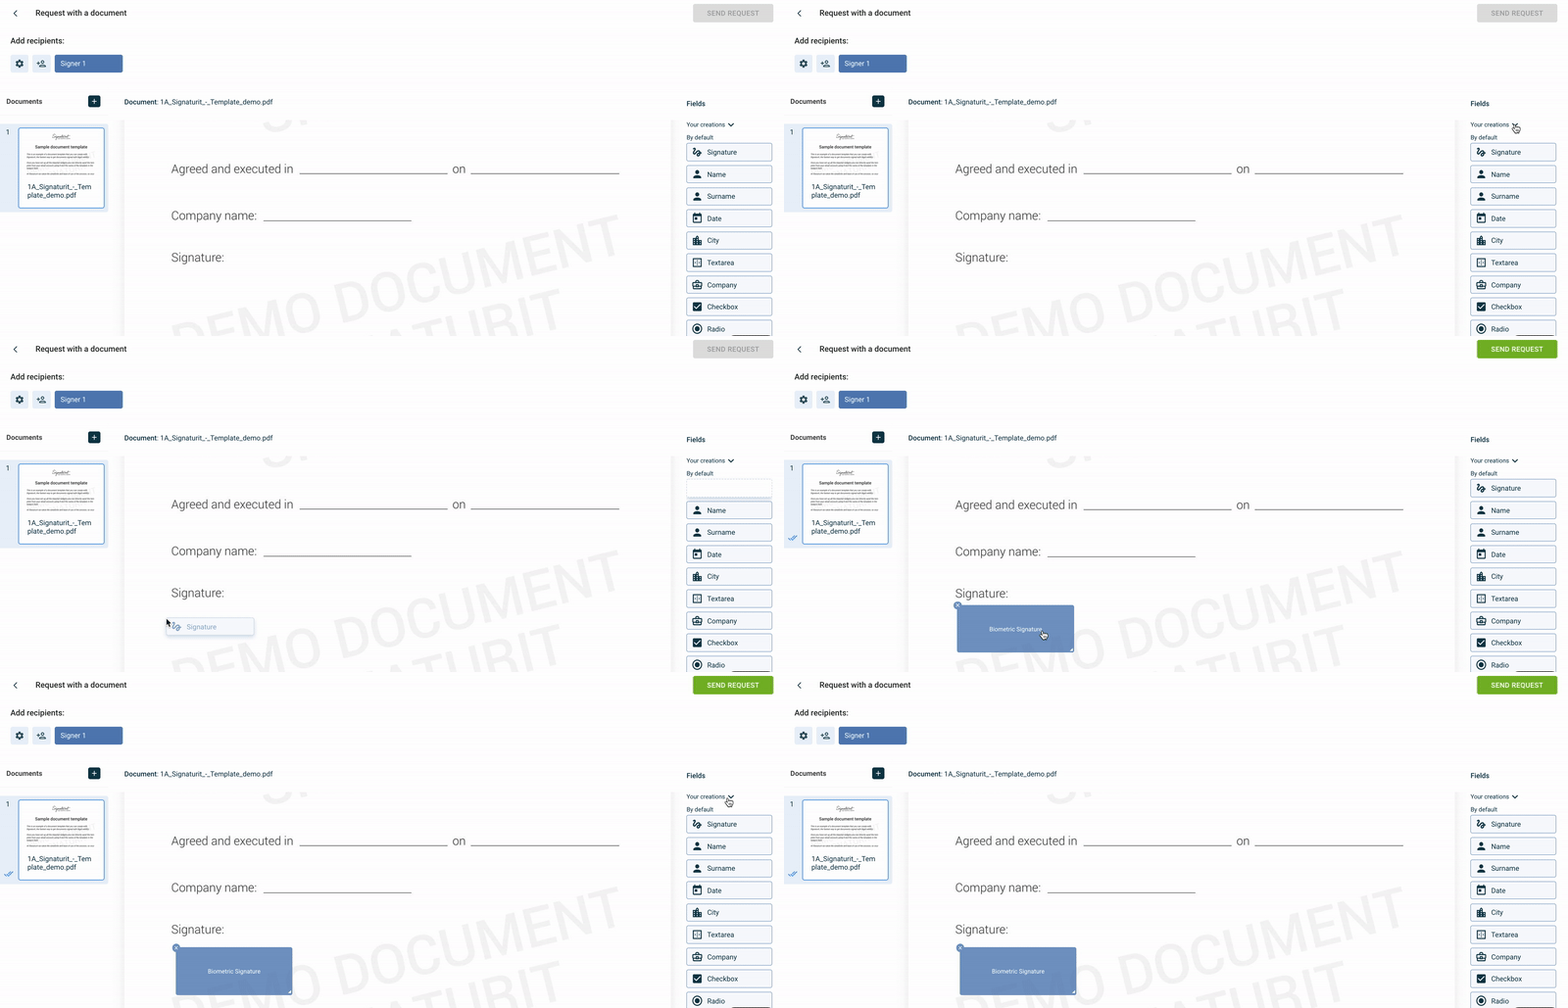
To start using widgets, click on one of them and drag and drop it wherever you'd like in the document. Remember that all Signers' tabs must include at least one widget (any) and that all documents must include at least one signature widget.
You can resize a widget by dragging one of the corners. Check out this animated GIF:
Form fields and widgets:
Signature widget:

The signature widget is the most important of all widgets. This widget is mandatory for at least one of signers involved in the process.
You just how to drag and drop it as in the GIF showed above.
Editable field

The editable field is the same field calle "Name", "Surname", "Company" or "City".
This field is totally customizable and it works as any form field that you might need.
Click on the widget once it's placed in the document. The configuration options will be displayed:
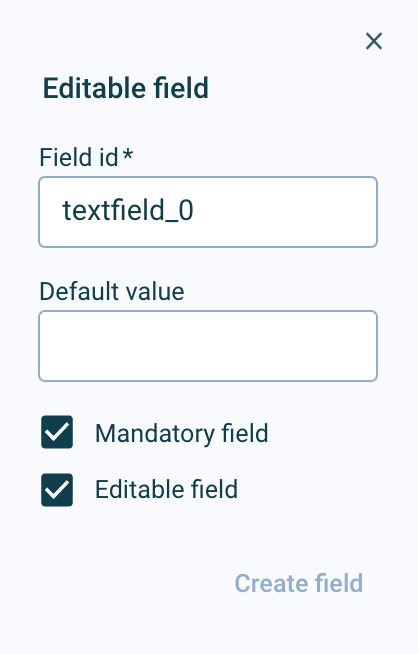
- Name: it allows you to name the widget. The signer will get a contextual help and he/she will know what to input in that field (name, ID number, address, job title, etc).
- Default value: it allows you to enter a default value. The signer will see the widget with fulfilled information. The signer will be able to modify it if necessary.
- Required: A widget can be mandatory or no. Check it if you need the signer to fulfill this information before finishing the whole signing process.
- Editable: the default value will be editable by the signer. If you deactivate this option, the widget will appear in grey and won't be editable.
NOTICE: Remember that all fields must be green when signing to successfully finish the signing process.
Textarea
![]()
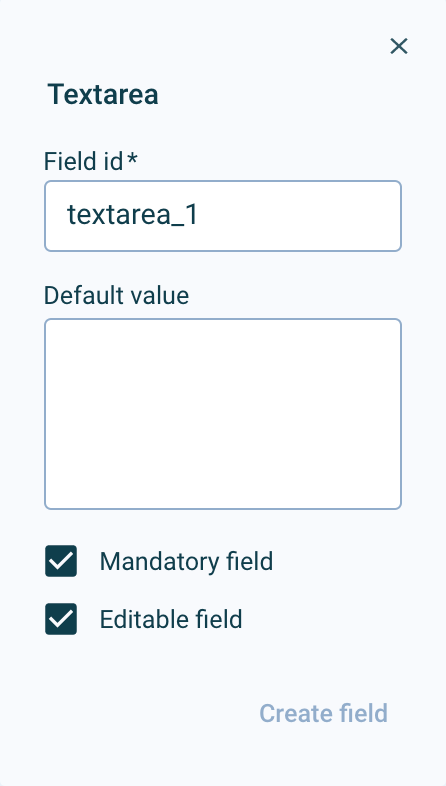
Textarea works very similar to "Editable field". In this case, this widget allows you to add line breaks and create long paragraphs. Is used to enter comments, descriptions, etc.
This widget has the same configuration options as "Editable field":
Date
![]()
With the date widget, the signer can enter a date (format DD-MM-YYYY) using a calendar.
Just like in all the previous widgets, you can also name it and enter a default value:
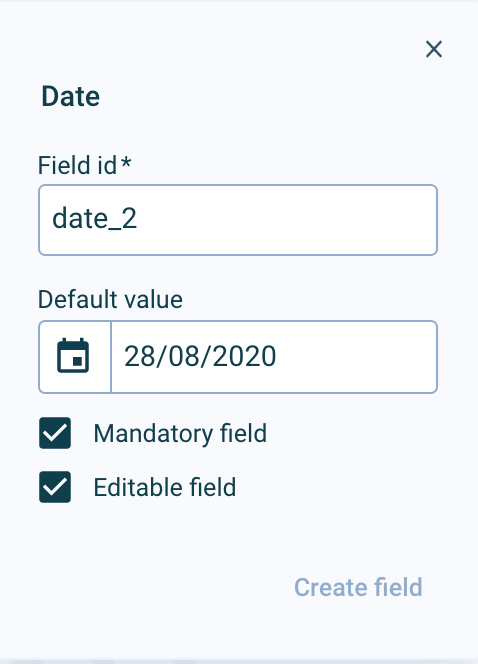
Use the calendar to enter a default value. Click on the month or year to easily navigate through the dates:

NOTICE: The date widget won't be automatically updated every time you send a signature request. We recommend you to set the "Date" widget with no default value and mark it as "Required". In this case the widget won't be missed and the signer will enter the current date.
Checkbox
More information here: How does checkbox work?

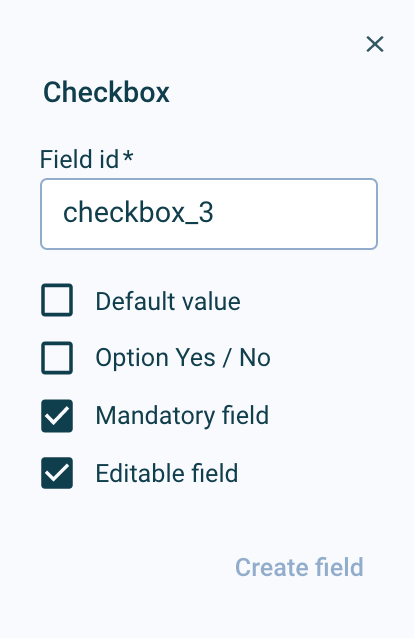
The checkbox widget permits the signer to make a binary choice: Yes or No.
With this widget you'll be able to ask for acceptance on your T&Cs, Privacy settings and any other points.

These are the options for the checkbox:
Radio
![]()
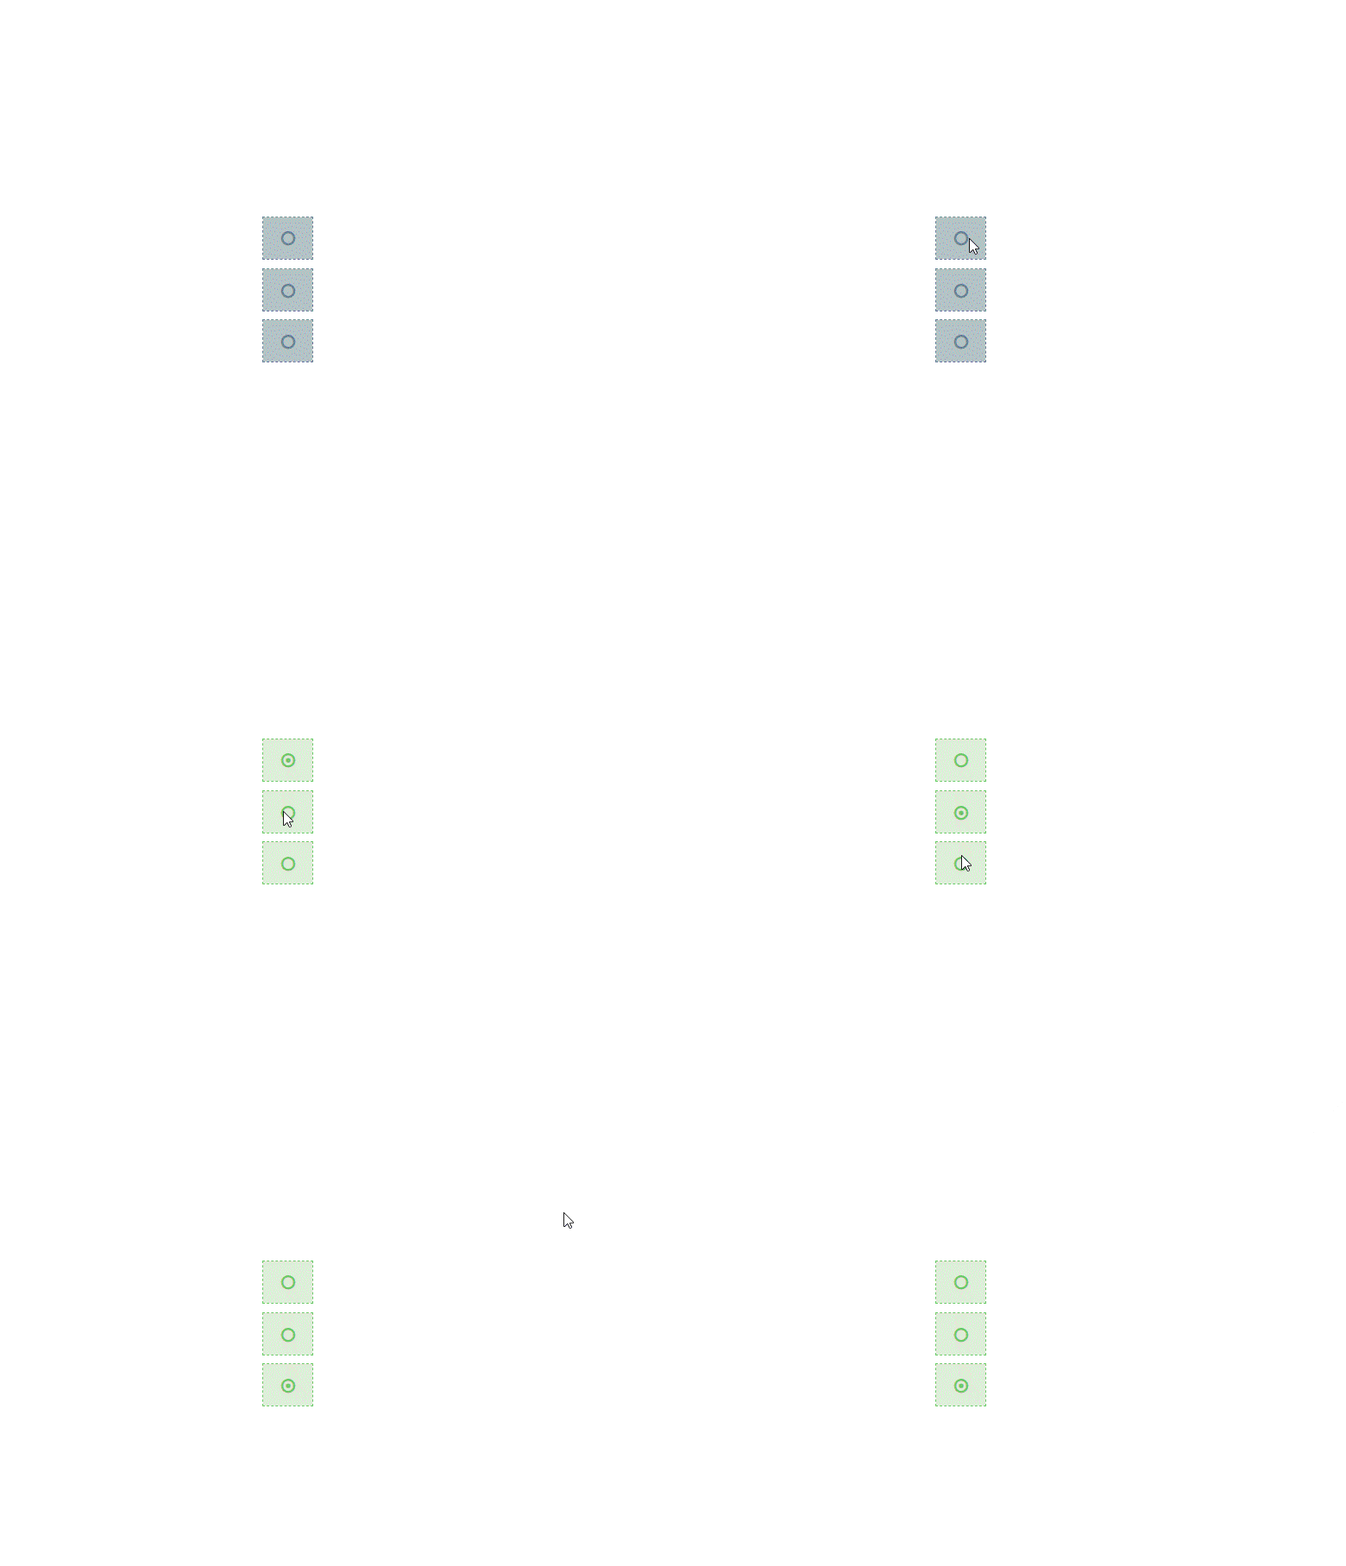
The radio widget allows the signer to select only one of several options:

To set up a radio widget, drag and drop a radio wherever you'd like in the document. Once it's placed, click on "Add new radio" (+) to add a new linked radio.
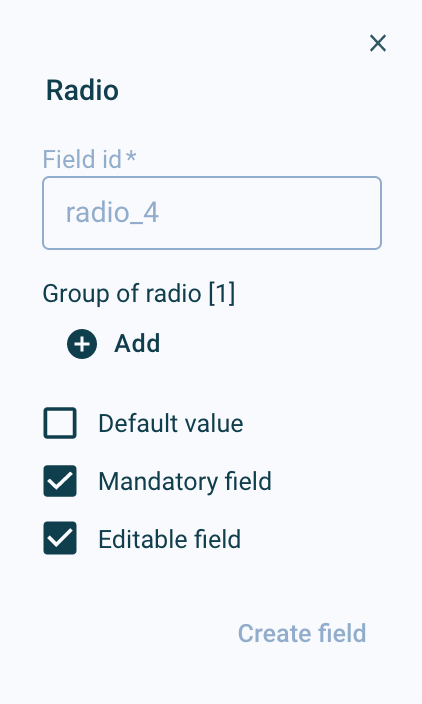
A new radio will appear and this will be linked to the original one.
As usual, you can set one radio as default, name it and set it as required.
This is the expected behavior:
Important: the field ID cannot be changed, as it is assigned automatically by the system.
Dropdown
![]()
The dropdown widget allows you to create a dropdown list. The signer will have to choose one option among that list to continue the process.
Click on "Add another value" to add a new item to that list.
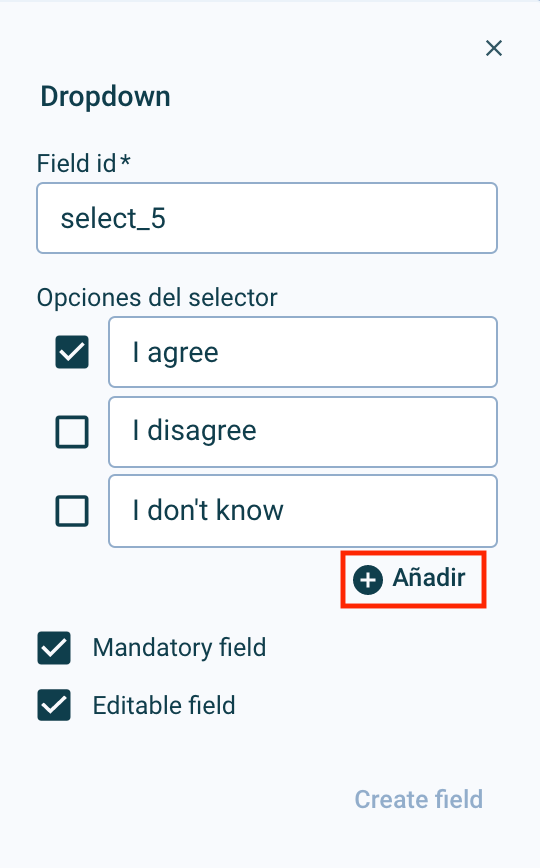
This is how the dropdown list will be showed to the signer:

Image
![]()
The image widget allows you to ask the signer for an image file. In this case, the uploaded image will be stamped in the PDF document.
This is useful to add the image of signature stamp or the photo of a person.
You can always set up a default image:
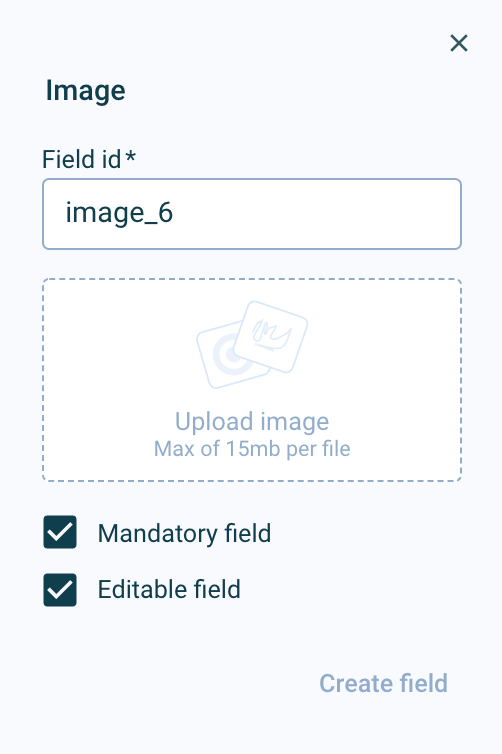
Check out this article that shows you how to request and send images as part of the signature process with Signaturit.
Digital Certificate:
![]()
The Digital Certificate widget is used in cases where you want signers to use their Digital Certificate to sign the document. You can see all the details of the process in the following article:
Send a request to sign with digital certificate from the Dashboard
In the case that the signature request has more than one signer, you can choose either to sign with a Digital Certificate or a handwritten signature using the Signature widget. However, the same signatory cannot use both signature methods in the same request.
Create custom widgets:
You can save your most frequently used widget settings to not having to start from scratch every time.
Those widgets you save will appear right above the default widgets. Click the arrow on the right to show or hide the widgets you have created:
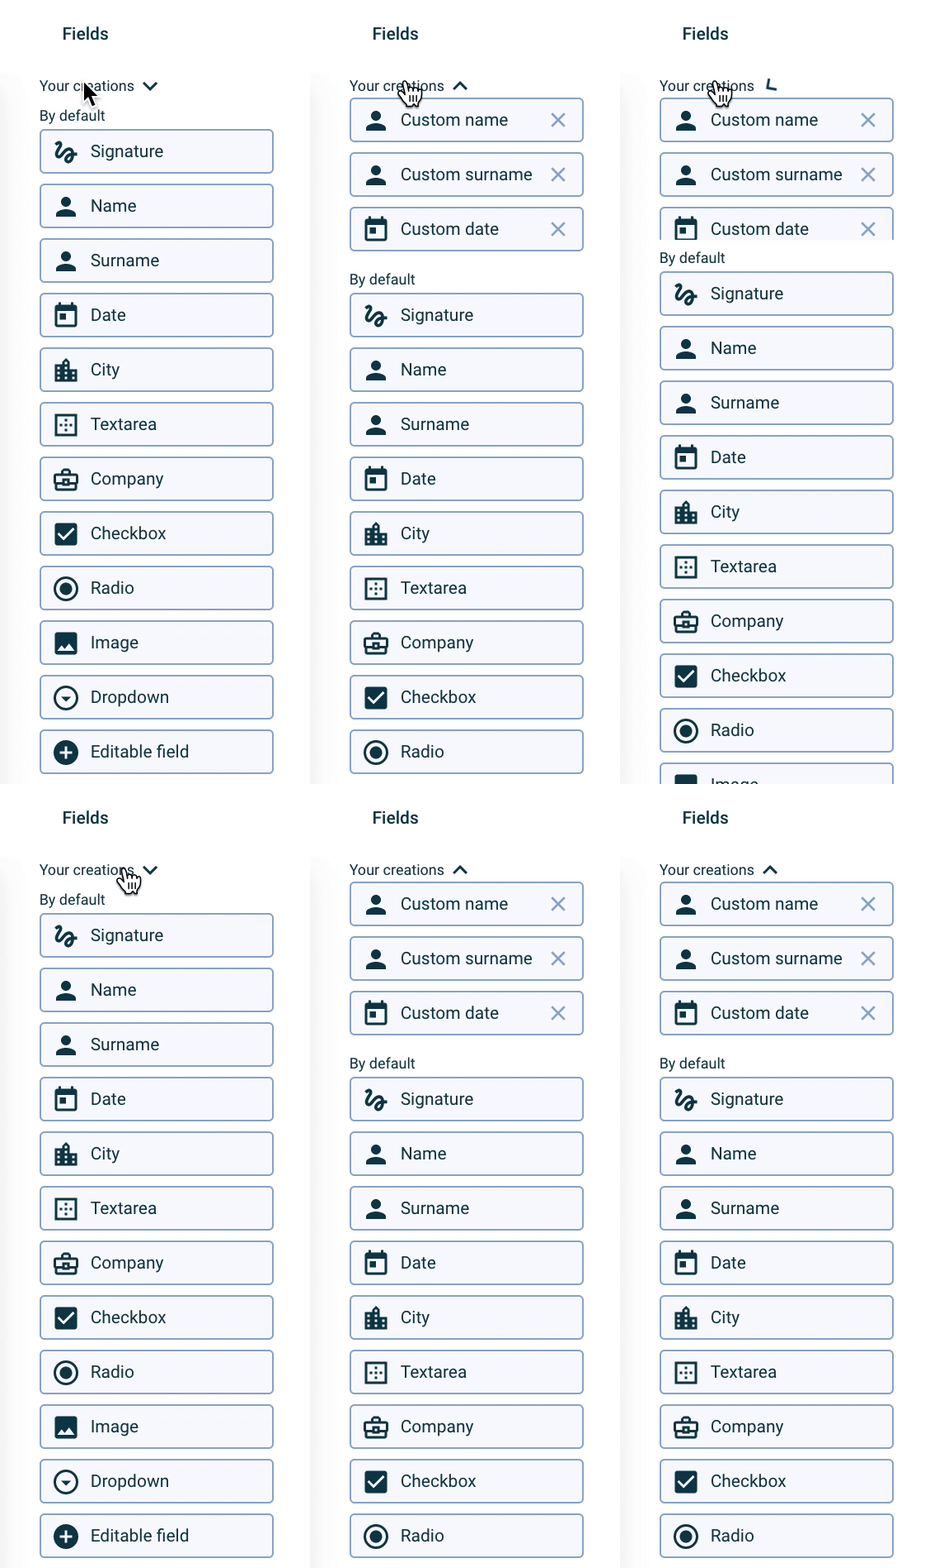
To save a widget you must check the option "create field" in the drop-down menu that opens when you click on it within the document. To recognise them and be able to classify them more efficiently you can set the name you want in updating the field in red:
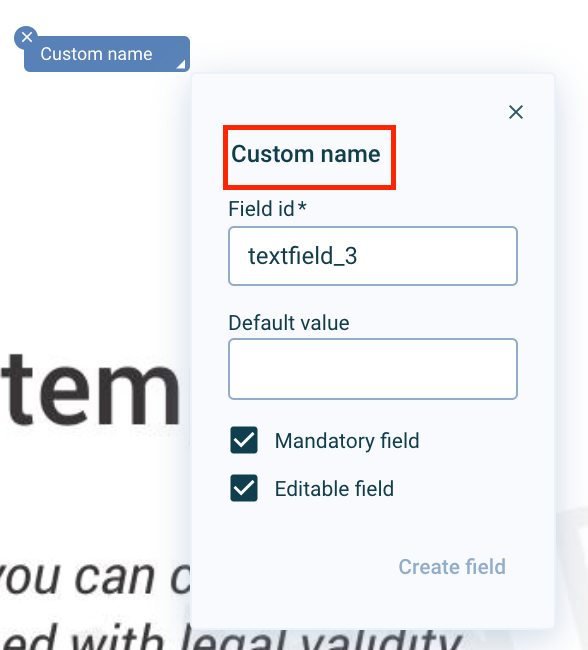
IMPORTANT: It is not necessary to click on the "create field" option every time you add a widget to a document, otherwise all the widgets will be saved within the "your creations" category. This option should only be used to create custom widgets.
Contact us at support@signaturit.com for any questions or doubts that you may have about the widgets.