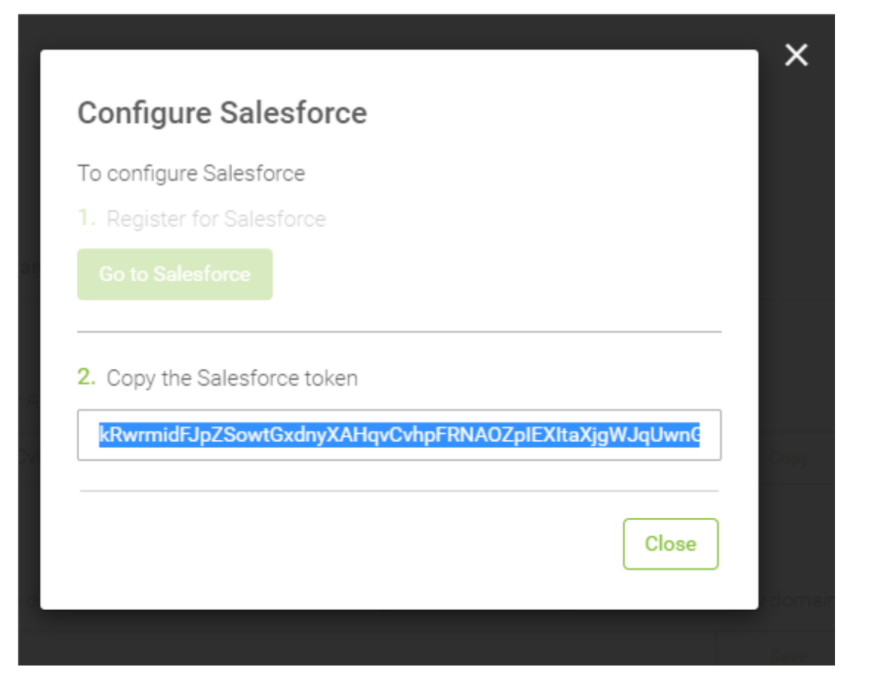
PLUGIN CONFIGURATION


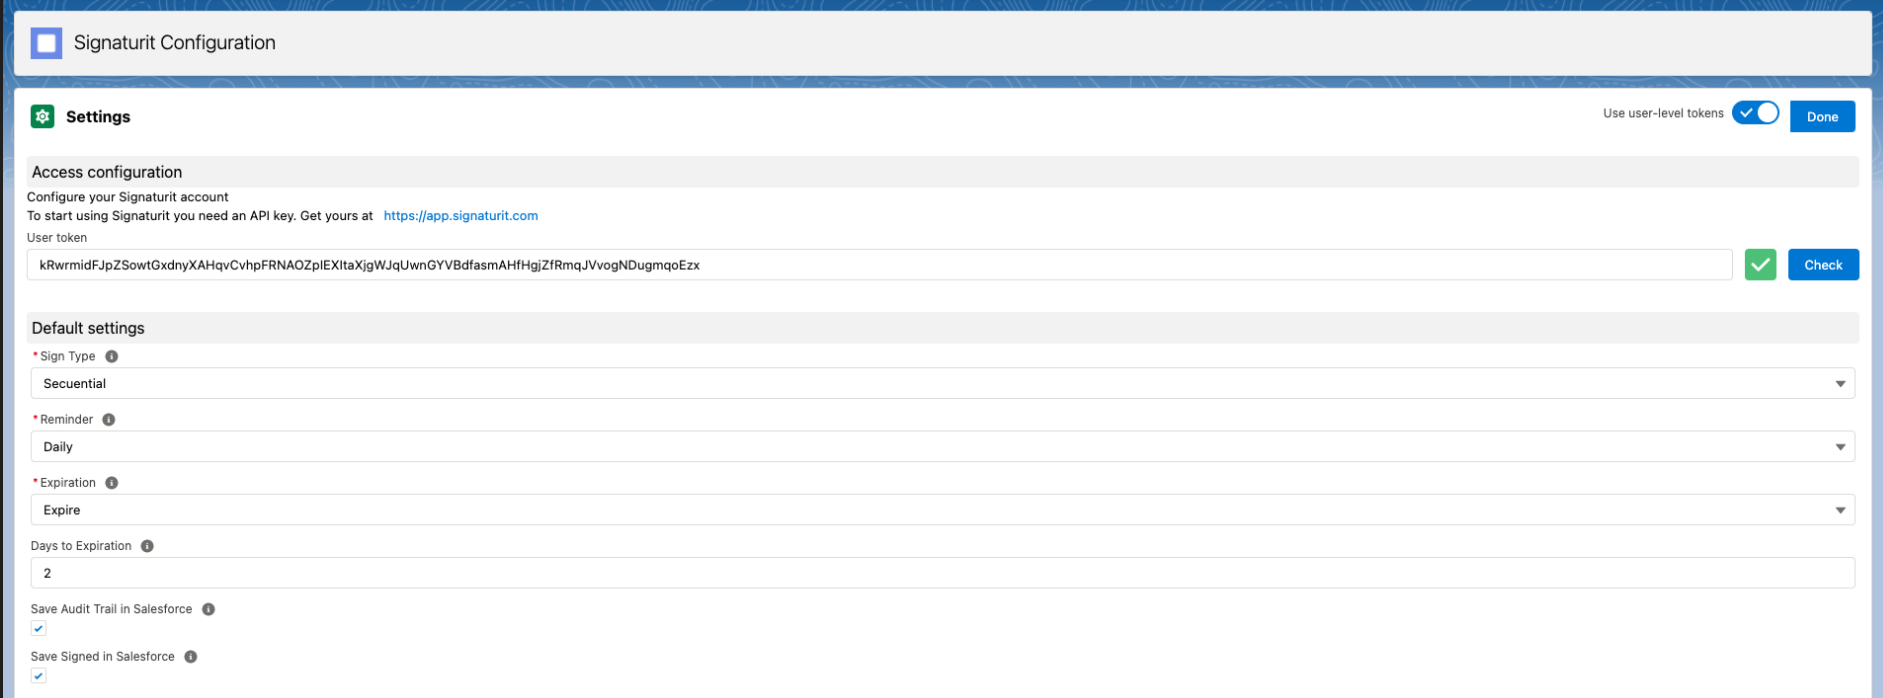
You will be able to select a general configuration for all request (later this can be modified for each individual request):
- Indicate the type of signature (sequential or parallel).
- Indicate reminders (Never, Daily, Weekly, or Custom by selecting the days of the week)
- Indicate the expiration of the signature processes (No expiration or With expiration indicating after how many days it expires).
- Store audit trail documents in Salesforce
- Store signed documents in Salesforce
SENDING ADVANCE SIGNATURES
There are 2 ways to send requests from Salesforce.
Sending from Signaturit Assistant:
Access "Signaturit's Assistant" in the top menu of Salesforce.
Record selection:
In the first stage we will select the record that starts the signing process.

- Only Salesforce documents related to this record will be available for selection.
- The original documents uploaded from local will be linked to this record.
- The signature process will be linked to this record.
- If audit trail or signed documents are stored, they will be linked to this record.
The objects available for record selection are as follows:
- Account
- Person account
- Contact
- Contract
- Lead
- Opportunity
- Order
- Task
- User
- All Custom objects (except for objects related to the signing process)
Once we have chosen the Salesforce Object and the record we can move on to the next step:
Document selection:

At this stage we can select the documents to sign. These documents can have 3 different origins:
- From Local (documents uploaded from local that will be related to the previously selected record).
- From Salesforce (existing documents in Salesforce related to the previously selected record)
- From Template (the use of existing templates in Signaturit)
The selection of the documents can be a mix of different origins. When we have at least one document selected (they will be displayed in the selection panel and can be deleted) we can move to the next step. The maximum number of documents to select is 15.
We can also go back to the record selection (previous stage) but if we modify our selected record we will lose the selection of documents we have made.

- Salesforce records (Person Account, Contact, Lead, User).
- External (the Name and email of the signers will be indicated).
- Signer
- Validator

Here you will indicate the signature widgets of the selected documents for the signers you have chosen. You can specify as many signature boxes as you wish as long as there is at least one signature box for each signer in each document.
To add a signature widget first select the document in the left column and the signer in the right column. Then drag the signature widget from the right column onto the document and place it on the desired page and location. The signature box can be moved and resized as desired.

In this section you will configure the signature request. This configuration will be preloaded with the base configuration defined by the Signaturit administrator.
It will be necessary to indicate at least the Name, which will be used for the name of the Salesforce record of the signature request and the Subject of the email that the signers will receive.
We can also indicate the body of the message in the rich text enabled for this purpose and modify the settings for the signature process we are sending:


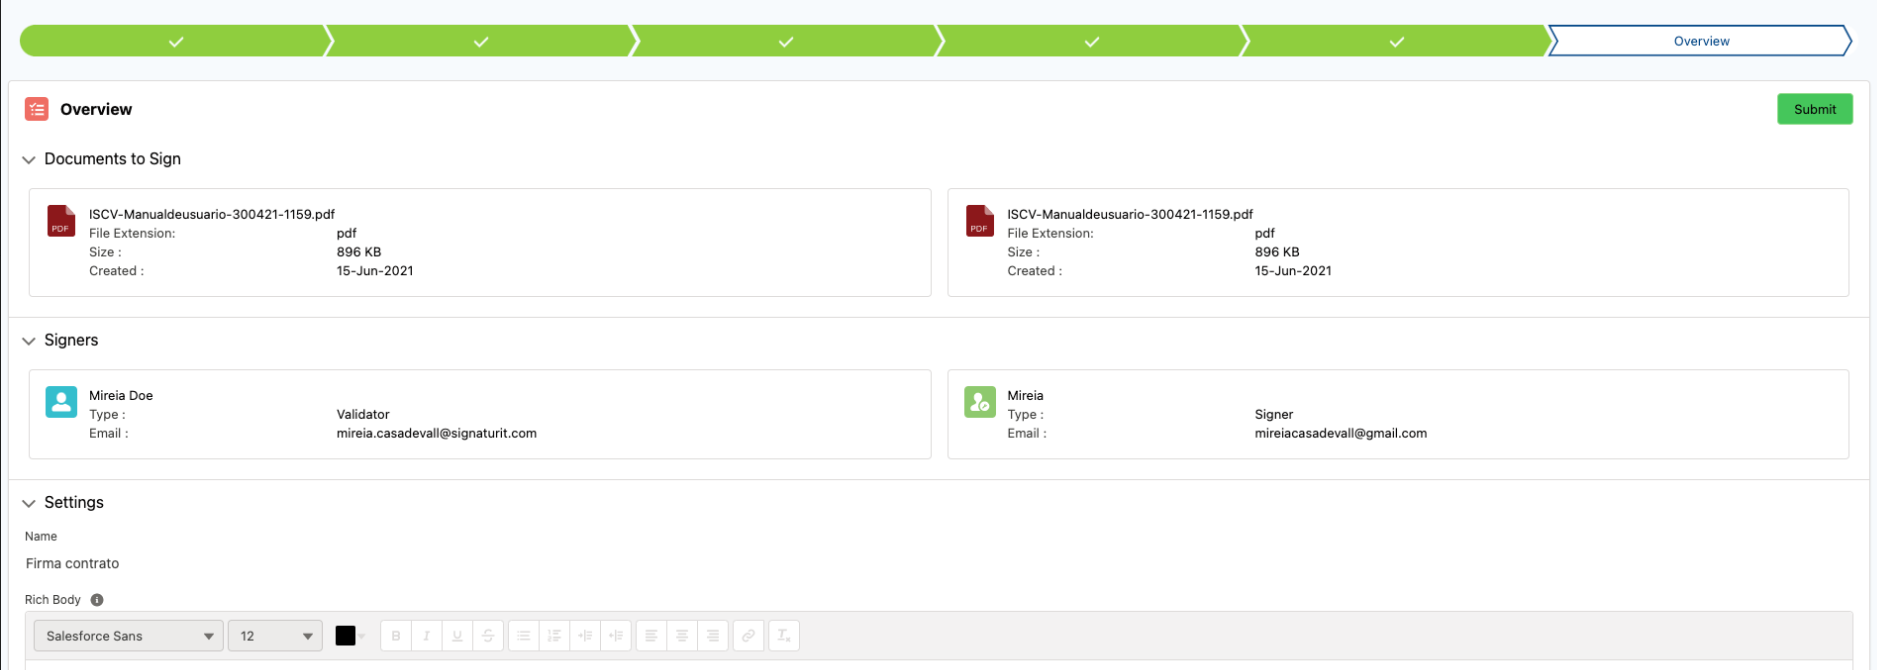
At this stage we will see the summary of the selection we have made before confirming the sending of the signature process. The moment we click on the confirmation button the signature process will be sent to Signaturit and it will be registered in Salesforce.
Sending from related list:
All users with permission to access the Signaturit application will be able to access the signing process from the related list as long as the administrator has arranged the component in the corresponding Object.
The first thing to do is to access the record from which we want to start the signing process.

Once inside we click on the New Signature Request button which will take us directly to the assistant to the Document selection step. The creation process is exactly the same as when starting from the assistant with the difference that no modification of the selected record will be allowed.
REQUEST MANAGEMENT
After sending the request, the signatories will receive the corresponding e-mails for signing the documents.
In the record from which the signature process was started, we can see the list of the signature processes that have been started, their creation date and their progress. We will be able to access the signature process to obtain more details.


Likewise, if file storage has been activated in Salesforce (both signed documents and Audit Trail documents), once the signing process has been successfully completed, they can be accessed from the record that started the process and from the record of the signing process.
